Finishing with Glue...
Apr 22 2016 0 Comments
Cyanoacrylate Glue, or CA for short, is commonly known by trade names such as Super Glue. It is an extremely strong and fast-setting adhesive available in three viscosities: thin, medium, and thick. Thinner glues have faster set times, while thicker versions have better gap-filling abilities. Once cured, CA is hard, crystal clear and waterproof but can be reversed with a special solvent or acetone. Though the solvent specifically for CA is expensive, it has the advantages of being faster acting and safer.
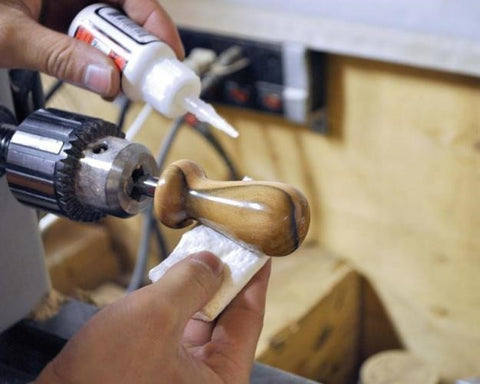
Using CA glue will give you a more durable finish for turned items subject to high wear. Often the finishes marketed towards wood turners work quickly to build a gloss finish but aren’t as durable as you might find.
Hard, clear, waterproof ... even reversible with the right solvent. Those are four of the most important properties of a finish. Like any finish, CA requires careful technique for it to be applied successfully. There are many different methods, each suited for specific situations. Regardless of which method you use, you will end up with a resilient finish. Once the finish is applied, rub it out to achieve either a wet look or a finish as matte as bare wood. Apply two or three coats for a gloss finish and four and five coats for a satin finish.
With a slightly different technique, you can apply the same tough finish to other woodworking projects. Below is a technique I got from the Internet:
To apply CA to a flat surface, you can use two polyethylene gloves, thin CA, and a rigid spreader (polyethylene is best but an old credit card or business card would also work). Apply a couple of drops and spread it out. Continue until the surface is covered. The first coat will soak in a lot – one drop will cover about 6 square cm. The second coat will also soak in, though not as much.
Once the wood is sealed, expect one drop to cover more than 64 square cm. Don’t apply many more than half a dozen drops at a time or you may find it sets before you can spread it out. Be careful of runs, which require more work later. As with any brushed finish, you can avoid runs by applying the finish sparingly – especially near corners. Once you’ve applied one coat, you can either let it dry on its own or you can use an accelerator. If you use accelerator, be careful not to drip any on the work piece, which would turn that area white.
To remove any imperfections, I use wet/dry sandpaper wrapped around a sanding block and lubricated with mineral oil. Before the second-to-last coat, I use 320-grit then I wipe the surface clean and apply a coat of finish. Then I sand with 400-grit before applying the final coat. Once the final coat has dried, some quick work with 600-grit should be enough to get a pristine surface.
At this stage your finish should be glossy and smooth. By buffing it with tripoli and white diamond compound applied to cotton rags or soft buffing wheels, you can slightly increase the gloss. Or, by scuffing the surface with 0000 steel wool and diffusing the reflected light, you can make the finish look almost as flat as unfinished wood. Should you rub through the finish, simply apply some more CA to that area and try again. Once you’ve achieved the sheen you like, you’re done. The best part about finishing with CA is that it is virtually maintenance-free – just keep it clean and it will continue to look as good as it did on day one.

Like many finishes, CA glues give off strong fumes so good ventilation is a must.
There is a lot of more information over the Internet explaining different techniques. So go for it!!!
Also, here is one of the many videos available explaining this technique;
https://www.youtube.com/watch?v=8zsJXC-17rU
Cheers Gaston.
0 comments
Leave a Comment